Showing posts with label gluten free friendly. Show all posts

Tuesday, November 10, 2015

Persimmon and Chicken Teriyaki

Recipe adapted from Today’s Cooking

DSC_7582

My husband’s co-worker gave us persimmons harvested from her own tree…my favorite, Fuyu variety with no seeds. As child, I would climb on a stone fence and snatch one…maybe two from neighbors. Some persimmon varieties are very astringent and inedible yet I knew the way to remedy the problem – peel the fruit leaving the stem intact then string it to dry in the sun. They turned very sweet…where did you get those? I don’t know why my mother bothered asking the question when she already knew the answer? I’m sure the neighbors would have gladly gave us of the abundance of the fruits since they can’t eat them all but perhaps pretending to be a shinobi (忍び /incognito) girl was thrilling…occasional scratches and bruises were part of the occupational hazard.

DSC_7532

I like to eat these like an apple, maybe with cream cheese though,  I would like to venture out for savory dish. Again I’m on the internet, search for savory persimmon recipe. Today’s Cooking caught my interest. Luckily, I have almost everything to make it happen and it seemed very easy. I also love the speedy clean-up at the end of the meal!

Ingredients and Instruction for two servings (Print Recipe Here)

Sauce

  • 4 Tablespoons soy sauce or tamari soy sauce
  • 4 Tablespoons mirin
  • 4 Tablespoons sake
  • 2  teaspoons sugar

Other ingredients

  • 10-12 green beans, cut both ends off, then cut in half
  • 300g boneless chicken thigh (about 2 chicken thighs), cut in one inch cubes.
  • 1 Tablespoon flour or cornstarch for gluten free version
  • 1 Tablespoon vegetable oil
  • 2 fairly firm persimmons (Fuyu variety recommended), cut in 4ths, peel skin (remove seeds if they have) then slice in 1/2 inch slices so that it will be a triangular shape.DSC_7535
  • 1/4 cup shelled walnuts, roughly chopped if they are whole
  • Juice from 1 kabosu (かぼす)  Note: I was not able to find this type of citrus, I substituted lime and satsuma orange.DSC_7544
  1. Mix sauce ingredients in a measuring cup or small bowl. Set aside
  2. Ready ice cold water in a bowl. Blanch green beans in salted (approximately 1 Tablespoon salt to 3 cups of water) boiling water about 1 minute. Drain water then quickly submerge the green beans into the prepared cold water bowl. When the green beans get cold, remove the beans. Set aside.
    DSC_7536
  3. Lightly coat chicken with flour or corn starch. Heat oil in large non-stick frying pan at medium heat. Brown chicken until golden in color. DSC_7540
  4. Push the chicken to the side of the pan and spread persimmons in the rest of the pan. When browned, flip over to brown the other side, about 3-4 minutes per side.
    DSC_7551
  5. Add blanched green beans and walnuts to the pan and stir.DSC_7553
  6. Pour in the prepared sauce, simmer at low heat until sauce thickens. It takes only 1-2 minutes so keep an eye on it so as to not let it burn.DSC_7558
  7. Squeeze lime and orange juice in. Stir. Serve warm.DSC_7561Voila!DSC_7573

 Other persimmon recipes we tried and  I posted on Instagram(#todaystapas,#todayssweets) are great I think.

Caramel persimmon and banana bread…next time I have to double the recipe and would like to share with neighbors…I follow the Japanese recipe and barely filled 3x5 pan. No-wonder Japanese people are skinny (me not included).IMG_5885-2

Persimmon Bread by my husband….so many persimmons so little time. Next stop - Angie’s Persimmon StreuselIMG_5896-3

We like persimmons yet a change of pace was inevitable….oven baked cheesy meatloaf in a kabocha bowl.IMG_5876-2

My mischievous Shinobi girl days are long gone…I can’t climb any fence over 3 feet tall now.

Tuesday, August 18, 2015

Chilled Peach Soup

Savory, tangy cold soup by Jason Franey

DSC_7091Overlooking Lake Union in Seattle, iconic Canlis is perhaps a food lover’s dream. Every dish is like a piece of art. Because of the size, the place lacks some cozy feel but the view is spectacular!…the view must cost something…no way is this a cheap eat.

Former Canlis chef Jason Franey who departed last year created the dish featured in Food and Wine magazine in 2011…tangy and fruity and no heat required, that’s what we need when it’s sweltering outside. Preparation is quick though it needs to be marinated overnight (very important step) so it definitely needs your patience and planning.DSC_7093

Ingredients and Instruction for 4 servings (Print Recipe Here)DSC_7066

  • 3 cups of peeled sliced peaches (about 4 peaches)
  • 1/4 cup peeled diced seedless cucumber, plus thin slices for garnish
  • 1/4 cup finely diced yellow bell pepper, plus some for garnish
  • 1/4 cup diced dried apricots
  • 2 Tablespoons honey
  • 3 Tablespoons crumbled fresh goat cheese, plus more for garnish
  • 1/4 cup white balsamic vinegar
  • 2 Tablespoons extra-virgin olive oil, plus 1/4 cup for making croutons
  • 1-1/2 teaspoons Kosher salt
  • 1 large garlic clove
  • 1 cup cubed (about 1/2 inch) baguette  Note: For gluten free, substitute toasted sunflower seeds or pine nuts
  • Basil leaves for garnish
  • Freshly ground black pepper
  1. In a large bowl, toss the peaches, cucumber, yellow pepper and apricots. Add honey, goat cheese, balsamic vinegar and 2 Tablespoons of olive oil, Kosher salt. Stir well and add garlic. Cover with plastic wrap and refrigerate overnight, at least 8 hours.DSC_7074
  2. Discard the garlic.Transfer the contents of the bowl to a blender and puree. Add 1/4 cup of water and puree until very smooth and creamy, add more water if the soup seems too thick. If necessary, add more salt and vinegar. Refrigerate the soup for an hour or so until very cold.DSC_7081
  3. (skip this process if you are substituting with nuts) Meanwhile, in a skillet, heat the 1/4 cup of olive oil. Add cubed baguette and cook over medium heat, stirring until golden and crisp.
    DSC_7075
    My husband made this ciabatta bread…he makes bread every week.

    DSC_7086DSC_7088
  4. Pour the peach soup into a bowl and garnish with sliced cucumber, bell pepper, goat cheese, croutons and basil. Drizzle lightly with olive oil, season with black pepper and serve.DSC_7097

From the Tapas post (#todaystapas)…Soy wrapped garden harvest (except avocado). Light, gluten free and fabulous.IMG_5105

Adapted from a Children’s book ‘Guri and Gura (ぐりとぐら) Kasutera (カステラ) recipe is easy to make…in the book, they shared this treat with forest friends…isn’t that nice?  The hand stitched kitchen towel is a gift from a friend. IMG_5096

Stay cool! Drink lots of water!

Tuesday, February 24, 2015

Fromage à la Crème

Cheesecake in a glass

DSC_5984I have a set of ‘made in Japan’, adorable glasses which came with plastic lids that I would like to bake purin (Japanese term for  pudding) in. I don’t know with certainly that they are oven proof.… I dug up an old cook book (Michiyo Kumabe’s Rich Sweets) for inspiration. This cheesecake I made with relative ease…maybe a bit out of season – ish though the fair weather we’re having justified the chilled dessert?DSC_5981

I made chiffon cake for the base. Substitute store bought pound cake or crashed graham crackers are nice shortcut. Feel free to omit base all together for gluten free version also for less calories (that’s what I should have done). I used blueberries though any other berry will do. Now raise your glass, say Santé (Cheers!).

Ingredients and Instruction for 1-12x8 sheet cake (Print recipe here

) Skip this process for gluten free version.

Necessary equipment: food thermometer, hand held mixer

Preparation: line *cake pan with parchment paper. *Use smaller size for thicker cake.

  • 2 egg whites
  • 80g granulated sugar
  • 2 egg yolks
  • 60g low viscosity flour (薄力粉) sift twice
  • 4 Tablespoons milk
  • 20g unsalted butter at room temperature
  1. Pre-heat oven to 338F. Beat egg white and sugar with hand held electric mixer in a large bowl till stiff peaks form.
  2. Add egg yolk and blend in with rubber spatula.DSC_5933
  3. Sprinkle flour in 1/4th at a time. Scoop batter from bottom of bowl and over to combine but do not over mix.
  4. Put milk and butter in a small microwave proof bowl and microwave for 10 seconds at 50% power. Check the temperature and repeat the process to warm milk mixture up to122F.
  5. Put 1 ladleful of batter into the milk mixture and mix well then put whole thing back into the bowl (process #3) and combine. DSC_5938
  6. Pour the batter into the prepared pan, tap the bottom of pan to remove air trapped in the batter. Bake for about 20 minutes. Check the doneness by inserting a wooden skewer. When it’s done, drop pan from a half-foot above the counter. This helps to keep the cake from shrinking. Remove cake from pan. cool cake on the rack. Wrap the slightly warm cake with plastic wrap to prevent drying out.
    DSC_5952

Ingredients and Instruction for cheesecake (enough to fill 10 – 6 oz. glasses)

  • 6g sheet gelatin
  • 2 egg yolks
  • 80g sugar
  • 4 teaspoons water
  • 250g cream cheese, room temperature
  • 50g sour cream
  • 300g heavy cream
  1. Soak sheet gelatin in a large bowl full of icy water.DSC_5962
  2. Put egg yolks and sugar in a large microwave proof bowl. Whisk until pale yellow. Add 4 teaspoons water and mix well.DSC_5954DSC_5957
  3. Place the yolk mixture in a microwave (no need to cover) and microwave for 40 seconds at 50% power. Mix well with whisk. Repeat the process 2-3 more times until the mixture gets a little thick.
  4. Squeeze the moisture from the gelatin and add to the still warm egg yolk mixture combine well.DSC_5963
  5. In another bowl, mix cream cheese and sour cream well and add to the egg/ gelatin bowl. Mix well and set aside
  6. Whip heavy cream till soft peaks form. Combine with egg yolk/ gelatin mixture
    .DSC_5968

Assembly

  • Sheet cake  See the recipe above.
  • Jam – any but perhaps coordinate with the fruit of your choice – I used homemade blueberry jam
    DSC_5977
  1. Cut out sheet cake with round cookie cutter or biscuit cutter to fit bottom of your glasses. You may want to freeze the cake scraps to use later.DSC_5974
  2. Drop a teaspoon of jam onto the cake.DSC_5978
  3. Fill with cheesecake leaving some space on top for fruits. Note; pastry bag with large tip will make it easier to fill. Tap bottom of the glass to remove air.DSC_5979
  4. Chill 3-4 hours in refrigerator and decorate with fruits.DSC_5994

The granola version…loved the crunch!DSC_5992

On Instagram try Today’s TAPAS (#todaystapas) to coordinate with calendar, on Valentine’s Day was theme of red…petit four style sandwiches. The beetroot bread I used here is recipe from Charles’s Five Euro Food.IMG_2637

Then on Chinese New Year -  spicy chicken pot stickers mimic fortune cookies. Homemade lantern and embossing the money envelop with lucky Chinese character (it says double joy)….was fun project!IMG_2694

Belated Valentine’s Day gift from our daughter arrived a few days ago…CHOCOLATE SHOYU (soy sauce) CARAMELS made in San Francisco…Unique! Definitely Wafu (Japanese style)!IMG_2730 

We don’t know what that is…This flower was only a half-foot tall with tight buds when church friends brought it. Only a week later it grew more than a foot and bloomed. It has storing mediciney scent. Striking isn’t it?IMG_2638

Spring is not so far away.

Tuesday, January 20, 2015

FRIED CHICKEN HOT POT

Kara-Age Sleet Nabe/ から揚げみぞれ鍋

DSC_5745It does not make sense, when you fry chicken nuggets until crispy then put them in the dashi soup, right? No, not a whole lot. but this is our favorite hot-pot dish. Although I don’t mind having this dish every week in cold months, it’s not so fun to fry the chicken pieces before hand every time.

IMG_2252

According to the original recipe from ‘NHK Today’s Cooking magazine, it’s a speedy nabe/鍋 (earthenware pot) dish because you are supposed to use store purchased ‘ever so popular’ kara-age/ seasoned Japanese style fried chicken nuggets which are readily available in any convenience store or grocery store… if you live.in Japan. I get that the nice umami flavor rendered from kara-age thus the cooking time is short. The grated daikon (in nabe term, this is called mizore/みぞれ, means sleet) tames the otherwise oily soup.

Gazillions of kara-age recipes are floating around on-line and I have my own recipe too…the freshly fried piece is most desirable…just be careful..it’s very hot! Warning: too much test munching while frying results in fewer pieces to go into the pot.

Marc’s kara-age recipe is one of my favorite. It’s a little sweeter. While you are at his site, check out his Orange Chicken; read the charming story and be awed by great photos. This recipe also requires kara-age…why not shoot two birds with one oil… oops, one rock?

Nipponnin’s Basic Kara-Age recipe- (Print Recipe Here)

  • Boneless chicken thigh about 450g cut in 2 inch chunks.
  • Marinating sauce – 2 Tablespoons of sake, mirin , soy sauce. 1 tablespoon each (or more/less) of grated ginger ( you may use grated ginger in tube for convenience) and grated garlic.
  • Potato starch (I recommend this) or corn starch approximately 1/3 cup
  • Oil for frying

Put all marinating sauce ingredients in a zip-lock bag, add chicken pieces. Massage well over the tightly closed bag. Rest in the refrigerator for at least 30 minutes. Drain any juice in the bag and add 1/3 starch, close the bag and shake well to coat chicken with starch. Add a little more starch if it’s too wet or if you want to have more body. Heat oil in thick bottom pan to 320F. Fry 2-3 pieces at time to avoid crowding until crispy and golden brown about 3 minutes. Receive in paper towel to absorb oil.
DSC_5722DSC_5727

Basic with twist – Add 2 Tablespoons mayonnaise (preferably kewpie mayonnaise) in marinate sauce for rich creamy flavor or 2 Tablespoon rice vinegar for tanginess.

Option #1– For crispier chicken, Fry them twice, I recommend this if you just making kara-age. (Fry for 2-3 minutes first in 320 F. Rest chicken pieces on paper towel. Heat oil up to 390F and put the chicken back in oil and fry for 40 seconds)..

Option #2 – Mix potato starch and 2Tablespoons of jyoshinnko (上新粉/type of rice flour) for extra crispy texture.

Ingredients and Instruction for Kara-age Hot Pot for 4 servings

  • 10 to 14 pieces chicken kara-age
  • 4 to 8 pieces ganmodoki (がんもどき/ tofu fritters)
  • 1 bundle mizuna,(水菜/Japanese mustard leaves)DSC_5724
  • 4 cups dashi stock, I used NO-MSG granule dashi dissolved in 4 cups of hot water
  • 3 Tablespoons sake
  • 1 Tablespoon soy sauce
  • 1 Tablespoon mirin
  • 1/2 teaspoon salt
  • 2 cups grated daikon /white radish with juice 
  • Yuzu pepper or yuzu paste, optional
  1. Prepare the ingredients and set aside followings – 
    Put tofu fritters in very hot water to remove some of oilDSC_5731.
    Cut off stem from mizuna then cut in 3 inch lengths.DSC_5728
    Mix dashi stock, sake, soy sauce, mirin and salt in a bowl.
  2. Pour dashi stock mixture in the stone pot and boil.
  3. Turn down the heat to medium, add tofu fritters and kara-age pieces and cook for 2-3 minutes
    DSC_5738.
  4. Add mizuna then grated daikon and it’s juice. Cook for 1 minute and it is done!
    DSC_5739DSC_5740
  5. Serve with yuzu pepper (optional)DSC_5741

Following night’s supperKara-age Udon  All your hard work is done the night before, just put quickly rinsed frozen udon noodle in the hot-pot left over (add more dashi stock if needed and adjust seasonings) and voila!DSC_5749

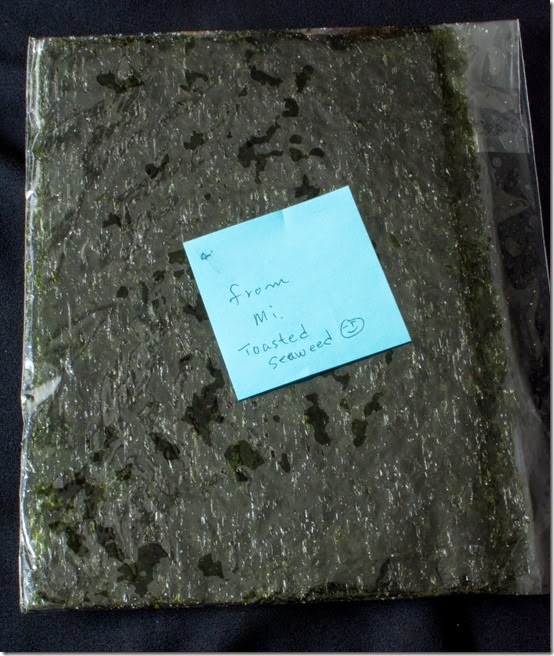
Flavorful Korean seaweeds sheets are always welcome – my husband received it from a co-worker. Isn’t that nice? DSC_5786Wisely made into Kara-age rolls!IMG_2255

I was doing really good last week…eating right/light until my husband made shokupan, Japanese style loaf of bread. Thank you Bake for Happy Kids! Nostalgia set in….Nous sommes contents (we are happy)!DSC_5835